
It was K’s 29th birthday a few Sundays ago, and we celebrated the big day together with a platter full of southern BBQ, a siphon coffee tasting and this epic cake.
My originally idea for K’s birthday cake was leaning more towards dark chocolate cupcakes, topped off with a Nutella-like icing, but that plan was quickly thrown out the window as I landed upon Marina‘s photo of her Ferrero Rocher cake.
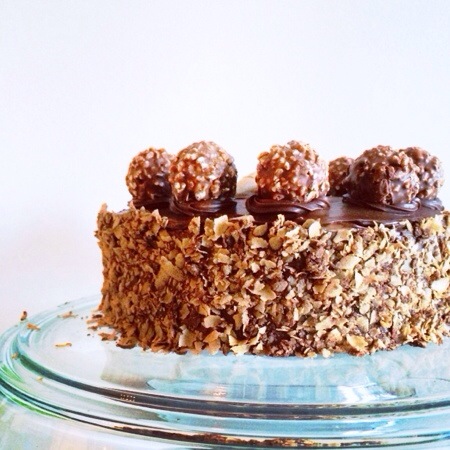
This cake has K’s name written all over it. 2 Hazelnut cake layers, iced with Nutella and pure chocolate and topped off with crushed wafers? This is K’s dream cake, and what better time to make it for him than on his birthday?
What surprised me the most about this cake is that it was actually a fairly simple cake to bake and build, especially if you bake the cake layers the night before, then make the icing and asemble the cake on the actual day of when you want to serve it. It also does not call for too many ingredients and it’s almost gluten-free (only 3 TBsp flour, and you can leave out the wafers), as ground hazelnuts replaced a huge portion of the flour.
Cake Layers
7 large eggs, room temperature
1/2 cups sugar
2 cups finely ground hazelnuts*
3 TBsp all purpose flour
3 TBsp cocoa powder
3 tsp baking powder
Icing
300 grams unsalted butter, room temperature
2 1/4 cups chopped chocolate (I used a mix of dark & semi-sweet)
1/2 cup Nutella
1/2-1 cup wafers, crushed
Decorating
8 Ferrero Rocher Candies
3/4 cups wafers, crushed
- Preheat oven to 350F. Line the bottoms of two 8 inch round cake pans with parchment paper and grease the side walls.
- Sift flour, cocoa & baking powder. Stir in ground hazelnuts.
- In a stand mixer or using a hand mixer, whisk the eggs with sugar until they are three times in volume, light and fluffy.
- Using spatula, gently fold the dry ingredients into the eggs, in three additions.
- Divide the batter evenly between the 2 cake pans and bake until a toothpick inserted into the cake’s center comes out clean. About 20-25 mins.
- To make the icing, melt the chocolate in a double boiler and let it cool to room temperature
- Whip chocolate, butter & Nutella until thoroughly combined and a delicious icing is formed
- To assemble the cake, make sure the cake has cooled, then evenly spread a healthy dollop of icing on the 1st cake layer and sprinkle with crashed wafers.
- Place the other cake layer on top and use the rest of the icing (saving maybe 1/2 cup) to ice the sides and top of the entire cake.
- Press the remaining crushed wafers onto the sides of the cake, then with the remaining 1/2 cup of icing, pipe 8 circular mounts or stars on the cake.
- Place 1 Ferrero Rocher candy on top of each piped star and serve immediately
- This cakes will keep in the fridge, but the hazelnut cake layers do tends to dry out a little faster than a regular cake, so I would recommend finishing it within 24 hours. The icing will also harden in the fridge, so always bring the cake back to room temperature before serving so that the icing can soften a little bit.
*You can buy ground hazelnuts directly on from grocery stores, or you can ground the Hazelnut yourself using a high speed blender or food processor. It’s definitely an extra step, but in my opinion, freshly ground nuts are so much better than the pre-packaged ones.
**I actually had a lot of icing leftover after the cake was assembled, so you prefer a light icing on your cake, you can probably cut the icing recipe in half. Alternatively, you can place the leftover icing in mini mason jars and give it away to your friends and neighbors as a elevated version of Nutella spread. They will love you for it.
Recipe found on Let the Baking Begin Blog. Original Recipe from Lubię Gotować

It’s toooo Awesome!!! thanks for sharing this wonderful article… Important tips are given in this article for making this awesome cake.
Some beautiful cakes relevant to this cake is also given on the site :
https://www.cakengifts.in/cake-delivery-in-faridabad
Truely this is yummy. My family members loved it very much, So I make it again and again.
I saw such beautiful cakes on the sites :
https://www.cakengifts.in/cake-delivery-in-dehradun
My cakes came out quite flat, I ended up baking a third. Did I perhaps not beat the eggs enough?
Hey Lisa,
My cake layers were definitely thinner than my ‘usual’ cakes made out of regular flour, but still thick enough to build a good size 2-layer cake. Did your cake rise at all?
If the cake did not rise, it could be because the eggs were not whipped enough, or the batter was overmixed.
Hope this helps! 🙂
Annie
Wow Annie… this looks AMAZING!! I thought I would never even try baking the actual cake from scratch… but this one might do the trick. I’m pinning your pretty picture 😛
Trish! Thank you, lovely you!
I had no idea that you were writing a blog! I shall be obsessive reading it over the next few days. xoxo